Lock-Up Contract
Your XPLL allocation might be subject to a vesting schedule that determines how many of your tokens are vested (unlocked) as time goes on. In order to claim the unlocked portion in the future, you need to first register the Lock-up Contract of your allocation to your account.
Note
Each Lock-up Contract is unique to each holder.
Follow the steps below to register your Lock-up Contract to your ParallelChain wallet account. You can also watch the video tutorial here.
Registering Your Lock-Up Contract
Step 1: Check Your Email For Your Lock-up Contract Address
Copy your Lock-up Contract address in the email
Step 2: Access Your Xperience Explorer Account
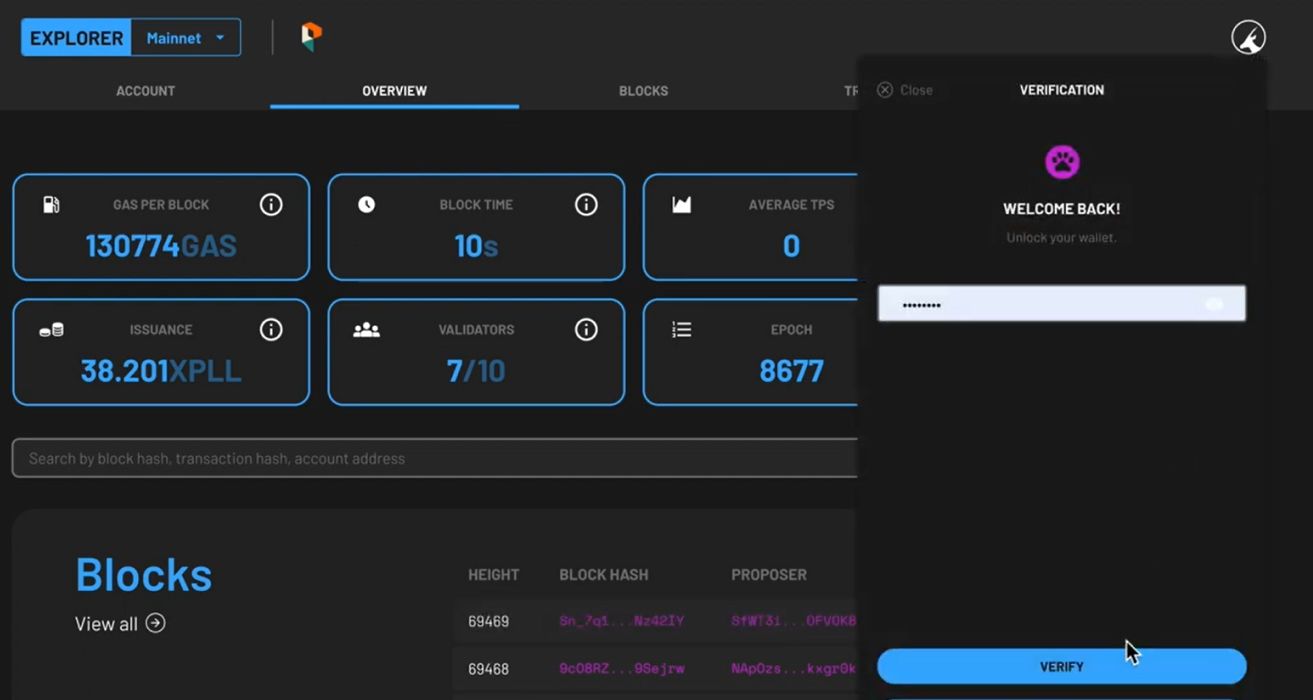
- Access the blockchain explorer, or click on the EXPLORER button on the ParallelChain homepage.
- To log in, click on the round icon on the top right hand corner of the explorer page and enter your password.
-
Press the LOGIN button.
Note
If you do not remember your password, you can choose to log in with your recovery key. Once you have access to your account, you should set a new password through your wallet settings.
-
Once you are verified, you can access your wallet account.
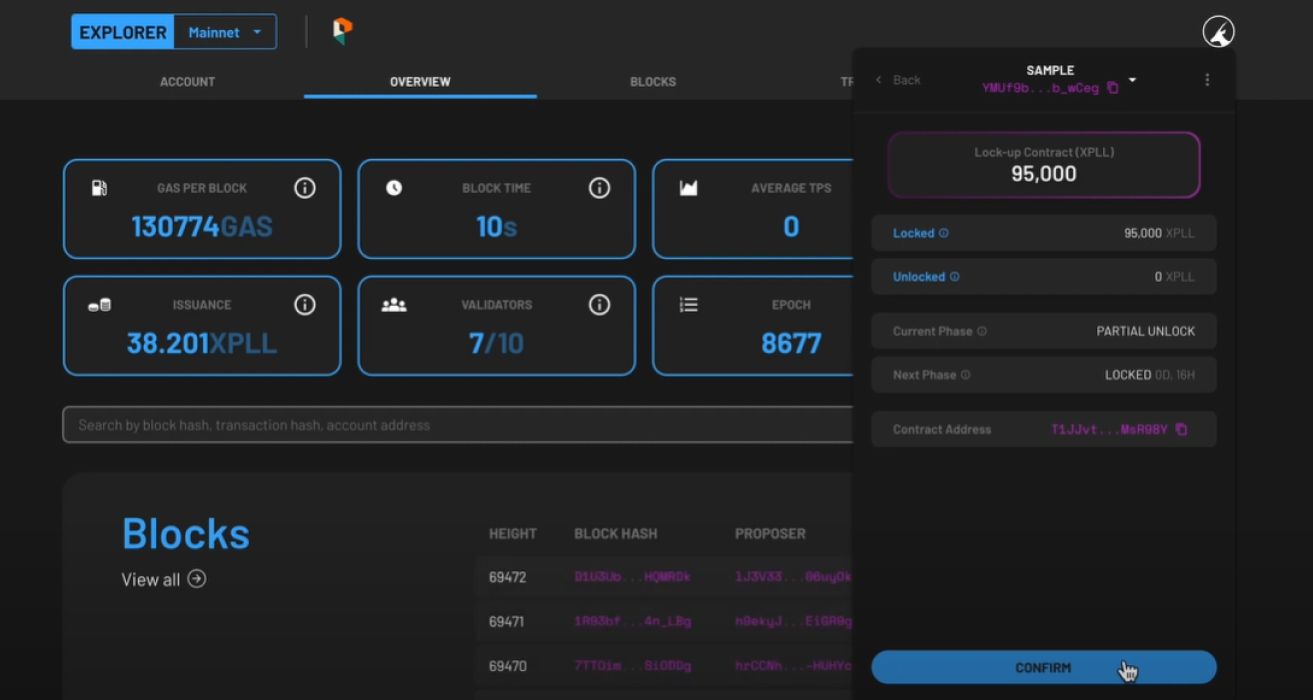
Step 3: Register Your Lock-Up Contract

- Click the pink icon located on the right side of the STAKE button.
- You will be asked to enter your Lock-up Contract address that has been sent to you via email. To proceed, paste the address in the INPUT CONTRACT ADDRESS field, then click Register.
- The balance of locked tokens is displayed under the LOCKED field, whereas the amount of vested tokens is shown under the UNLOCKED field. You will have to manually claim the vested tokens to have them transferred to your normal account.
-
Your account comes with a small amount of XPLL to pay for the gas fee for the first transaction.
-
Click the CONFIRM button to confirm.
Note
For Node Round participants who will operate validator nodes on ParallelChain, the locked balance shown will be 0 as your allocation has been automatically staked on one of the existing validator nodes.
Watch the video tutorial to register your locked-up contract here.
Claiming Your Vested Tokens
Step 1: Log Into Your ParallelChain Wallet Account
-
Access the blockchain explorer , or click on the EXPLORER button on the ParallelChain homepage.
-
To log in, click on the round icon on the top right hand corner of the webpage and enter your password.
-
Press the LOGIN button.
Note
If you do not remember your password, you can choose to log in with your recovery key. Once you have access to your account, you should set a new password through your wallet settings.
-
Once you are verified, you can access your wallet account.
Step 2: Check Your Vested Balance
-
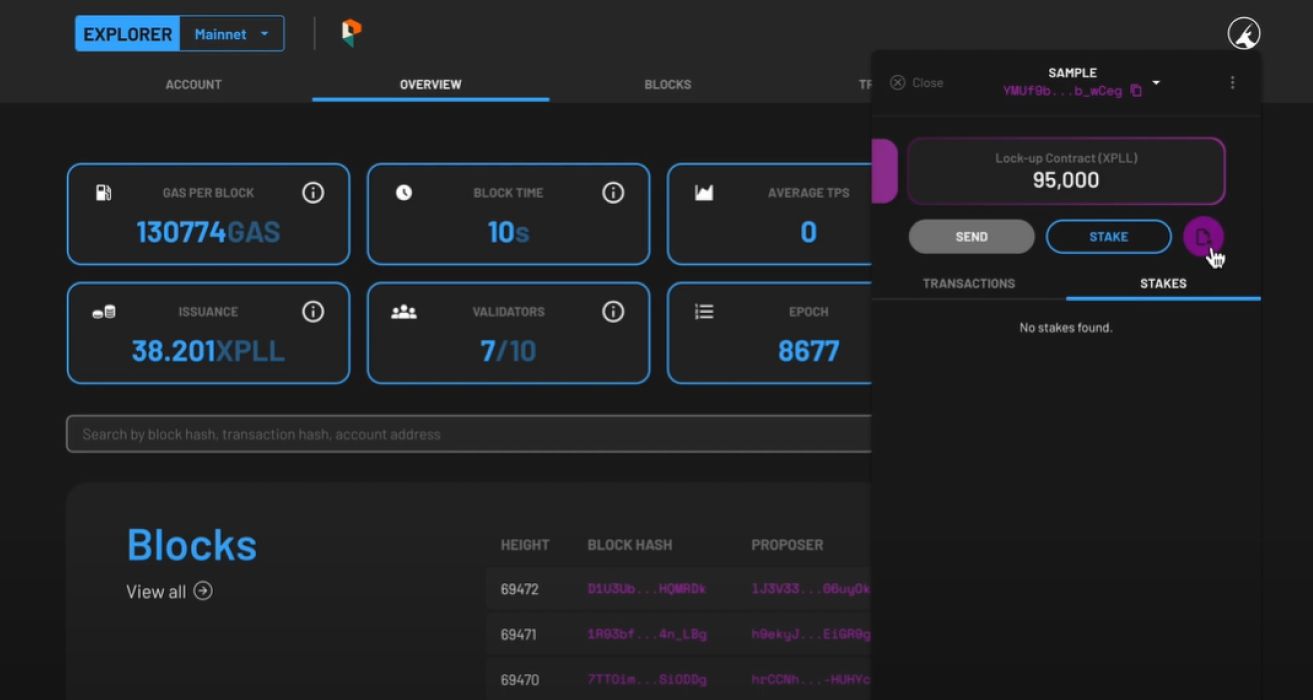
Click the pink icon located on the right side of the STAKE button.
-
On the main display of your account, make sure that you can view your Lock-up Contract (XPLL) which is shown beside your main balance.
-
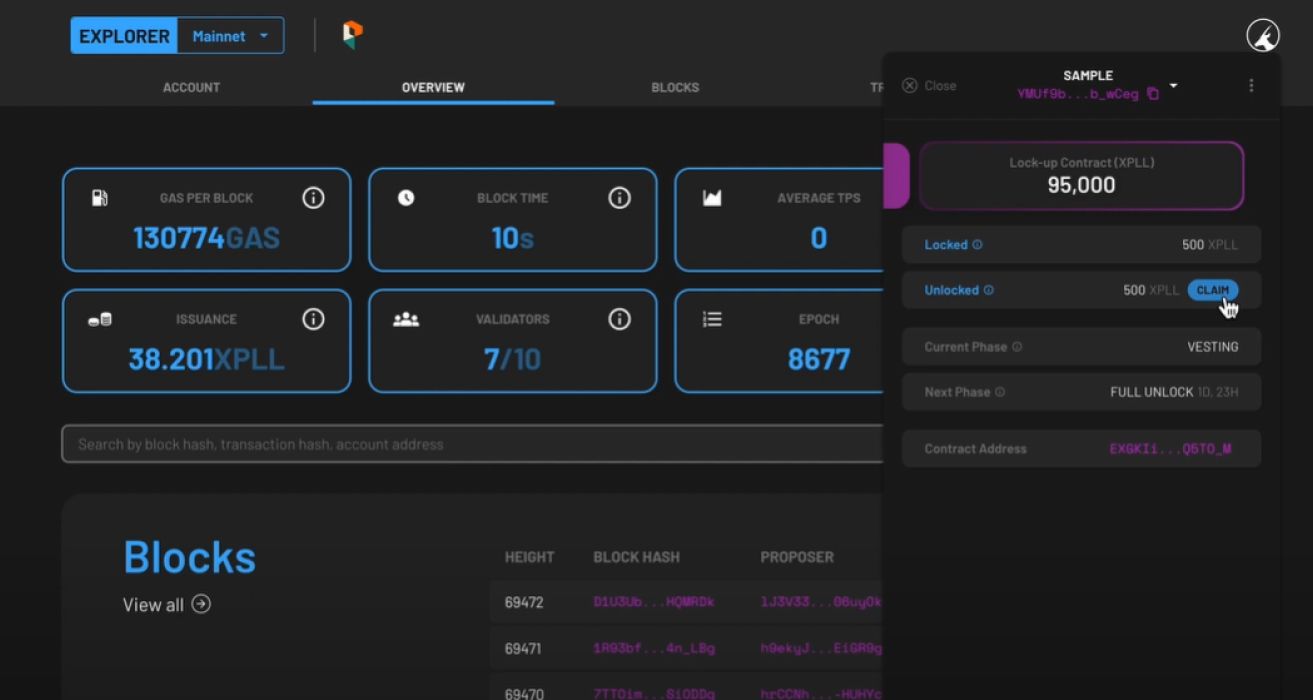
Tap on the Lock-up Contract (XPLL) window. It will expand to display different fields.
- LOCKED - the tokens that currently cannot be claimed.
- UNLOCKED - the tokens that currently can be claimed.
- CURRENT PHASE - the vesting phase it is in at the moment.
- NEXT PHASE - the amount of time left before your tokens are vested
-
Under tte UNLOCKED field, you can see the amount of tokens that is currently available to claim (unlock).
Claim Your Vested Tokens
-
Under the UNLOCKED field, press the CLAIM button to initiate your token claim.
-
You will see two fields, the BALANCE field and CLAIM field. The first shows the current amount of tokens in your account balance, and the other field lets you enter the amount of tokens you wish to claim.
-
Under the CLAIM field, enter the amount of XPLL you wish to claim. This number cannot exceed the amount in the UNLOCKED field.
-
Press the NEXT button at the bottom once you are satisfied with the amount entered.
-
The following fields will appear:
- Nonce - will be automatically populated for you.
- Max Base Fee per Gas - The minimum fee is 8 XPLL, and this field will be automatically populated for you.
- Priority Fee per Gas - the priority of your transaction. The minimum fee is 0.
- Gas Limit - will be automatically populated for you.
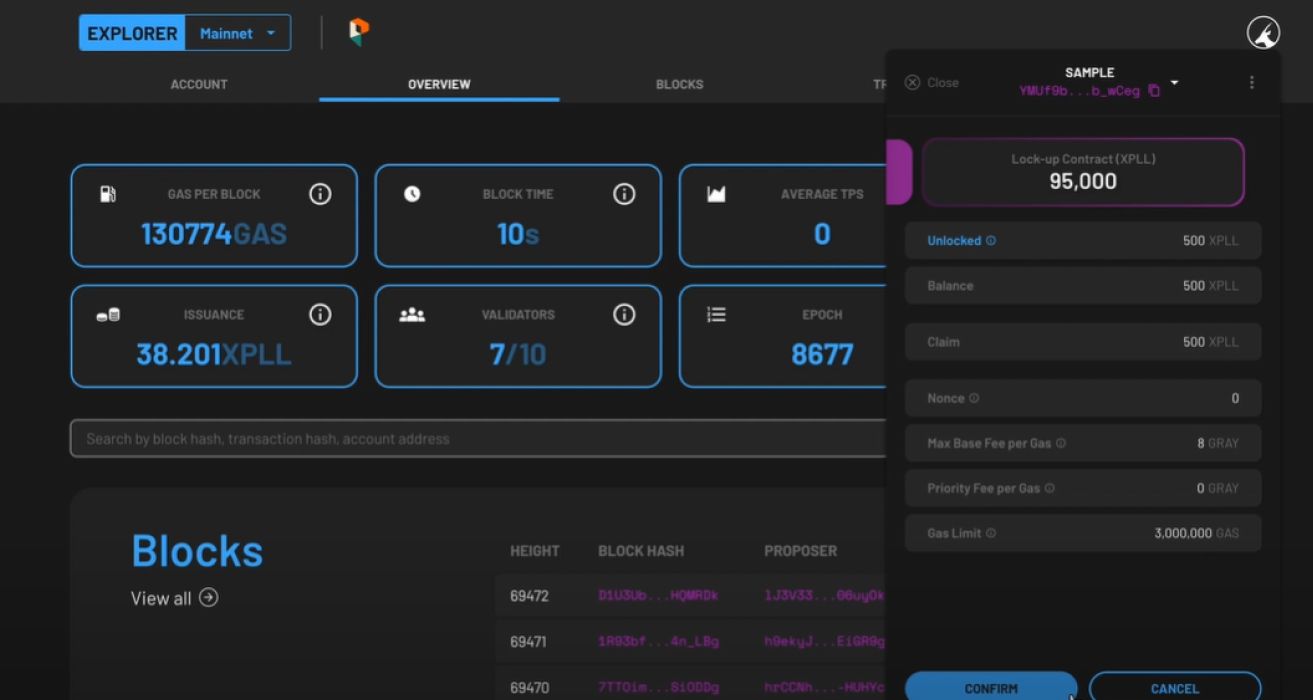
-
Once you are satisfied with the populated fields, press NEXT at the bottom.
-
Preview the summary of the transaction, then press CONFIRM to continue, or CANCEL to make edits.
-
The status of the token deposit will be shown as PENDING. When it is validated by the network, a SUCCESS will be shown under its status tab.
-
The claimed tokens have now successfully been transferred to your account balance.
Watch the video tutorial to claim your vested tokens here.
FAQ
Do I need to wait for the full vesting period before being able to claim the locked XPLL?
A set amount of XPLL will be unlocked after a set period of time, and will be displayed in the UNLOCKED field. You may choose to claim after the end of each duration, although gas fees will have to be paid each time. You can also choose to accumulate the unlocked XPLL and claim them later in one transaction.